How do I change my eSIM label?

You can store multiple eSIM profiles in one smartphone and switch between them as needed. To make managing your eSIMs easier, you can rename their labels for quick identification.

When you install a new eSIM, your device will automatically assign it a default label. Howev3er, you can go to your device settings to rename it. It is recommended to choose a name that helps you easily recognize the eSIM, such as “Thailand eSIM” or “Gigago eSIM.”

Follow these steps to change your eSIM label on iOS, Samsung or Google Pixel devices:

On iOS devices:
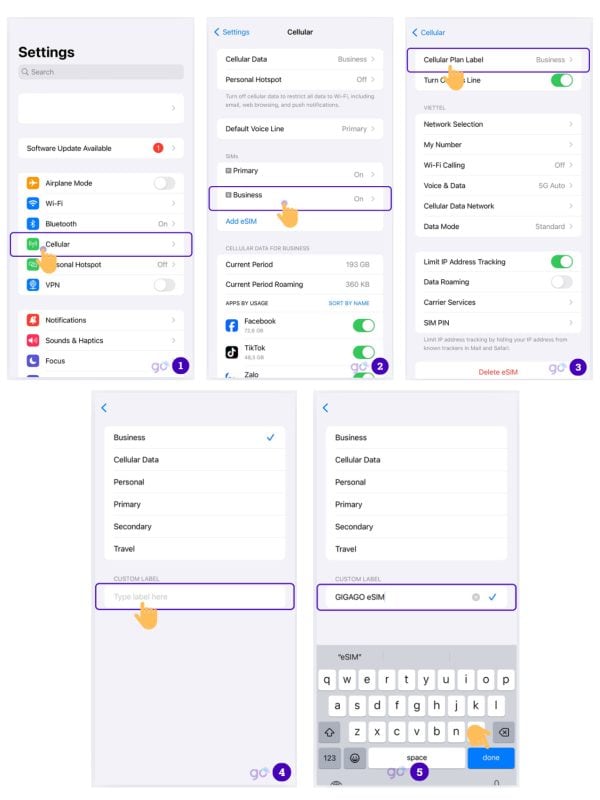
  • Go to Settings > Cellular / Mobile
  • Under the SIMs section, select the eSIM you want to rename
  • Select Cellular Plan Label / Mobile Plan Label
  • Edit the default label in the Custom Label field
  • Once renamed, exit the settings.
Change label of eSIM on iOS devices
Steps to change label of eSIM on iOS devices

On Samsung devices:

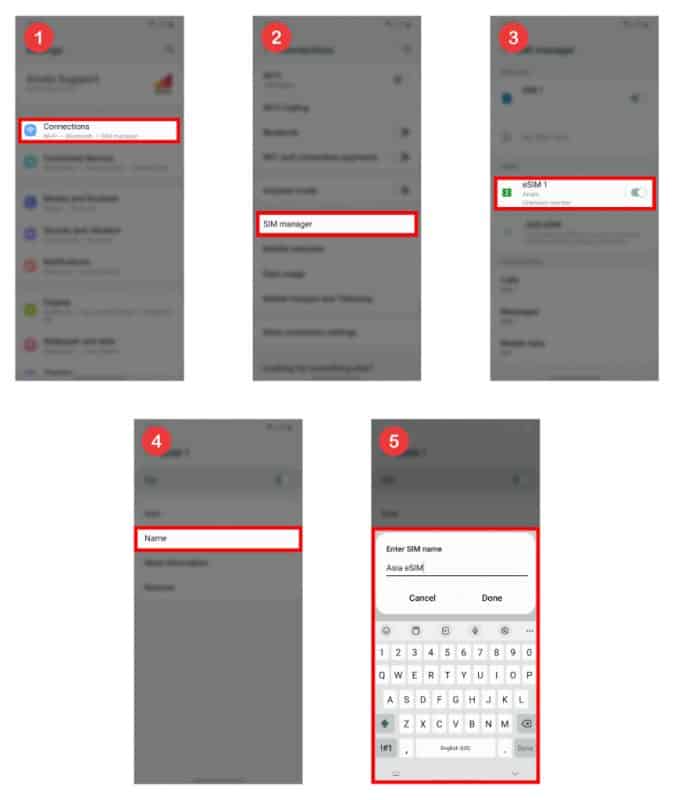
  • Go to Settings > Connections > SIM Card Manager
  • Select the eSIM profile you want to rename and enter a new name
  • Select Done to save the changes.
Steps to change label eSIM on Samsung Galaxy

On Google Pixel devices:

  • Go to Settings > Network & Internet
  • Select SIMs > choose the eSIM you want to rename
  • Select the pencil icon toedit the label
  • Enter the new name for the eSIM.
  • Select Save to apply the changes

Optional: you can also change the label’s color for better visual organization.
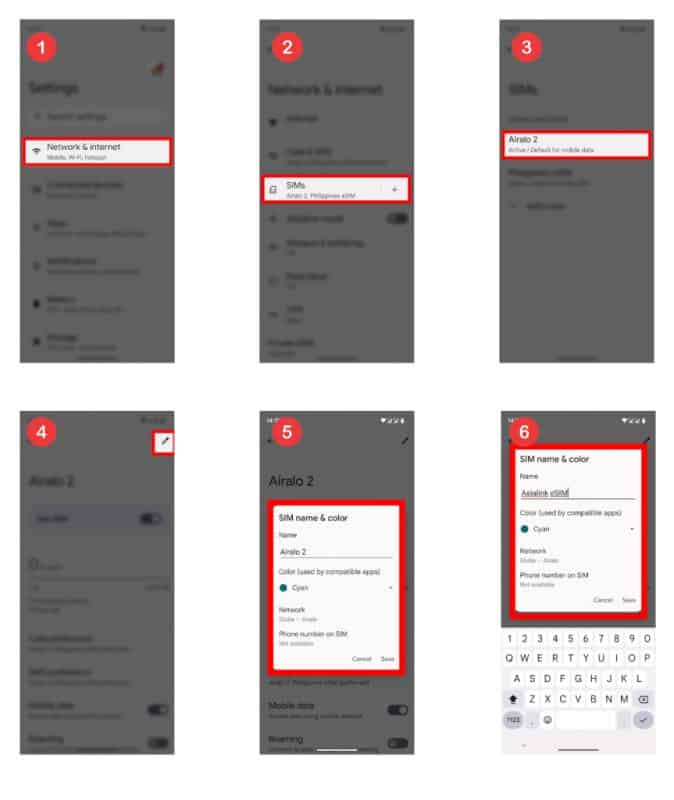
Steps to change label eSIM on Google Pixel

Your eSIM label is now updated to your preferred name. You can edit as many times as you want by following the same steps.